
How to add a DNS Record in cPanel with the Zone Editor
Somtimes you may need to add a DNS record to your domain in cPanel, for example to set up Google Workspace or verify your domain with a third-party service. In this guide, we will walk you through the steps to add a DNS record in cPanel.
- Log in to cPanelLog in to your cPanel account using your credentials.
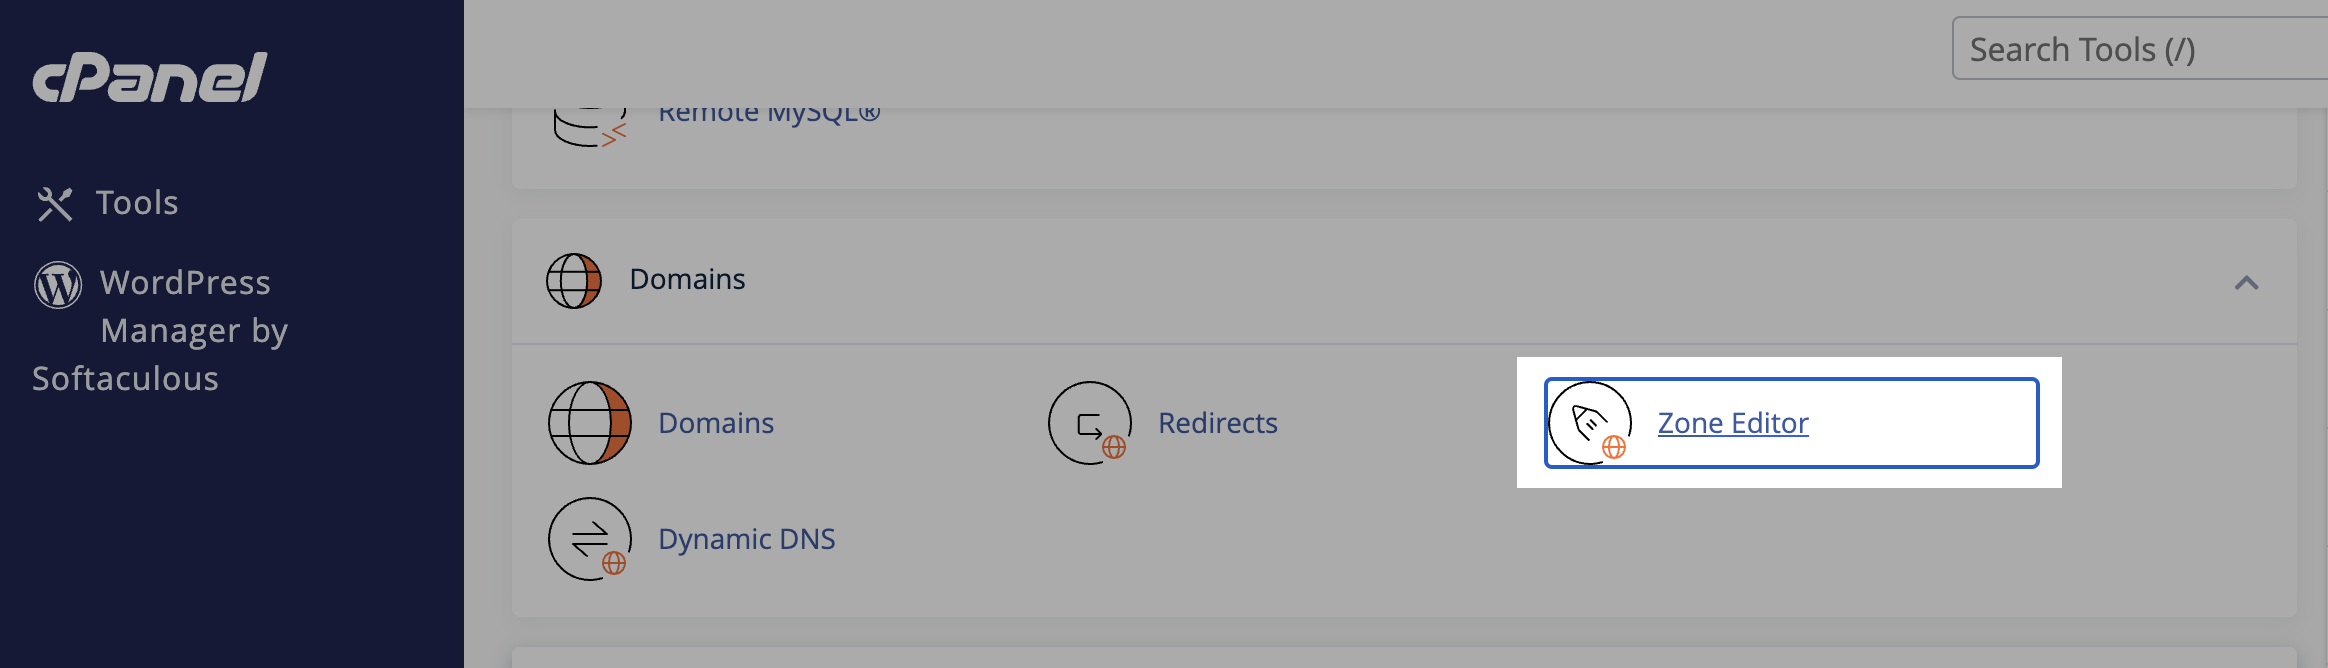
- Go to the DNS Zone EditorIn the cPanel dashboard, navigate to the “Domains” section and click on “Zone Editor.”
 Find your domain in the list of domains and click on “Manage.”
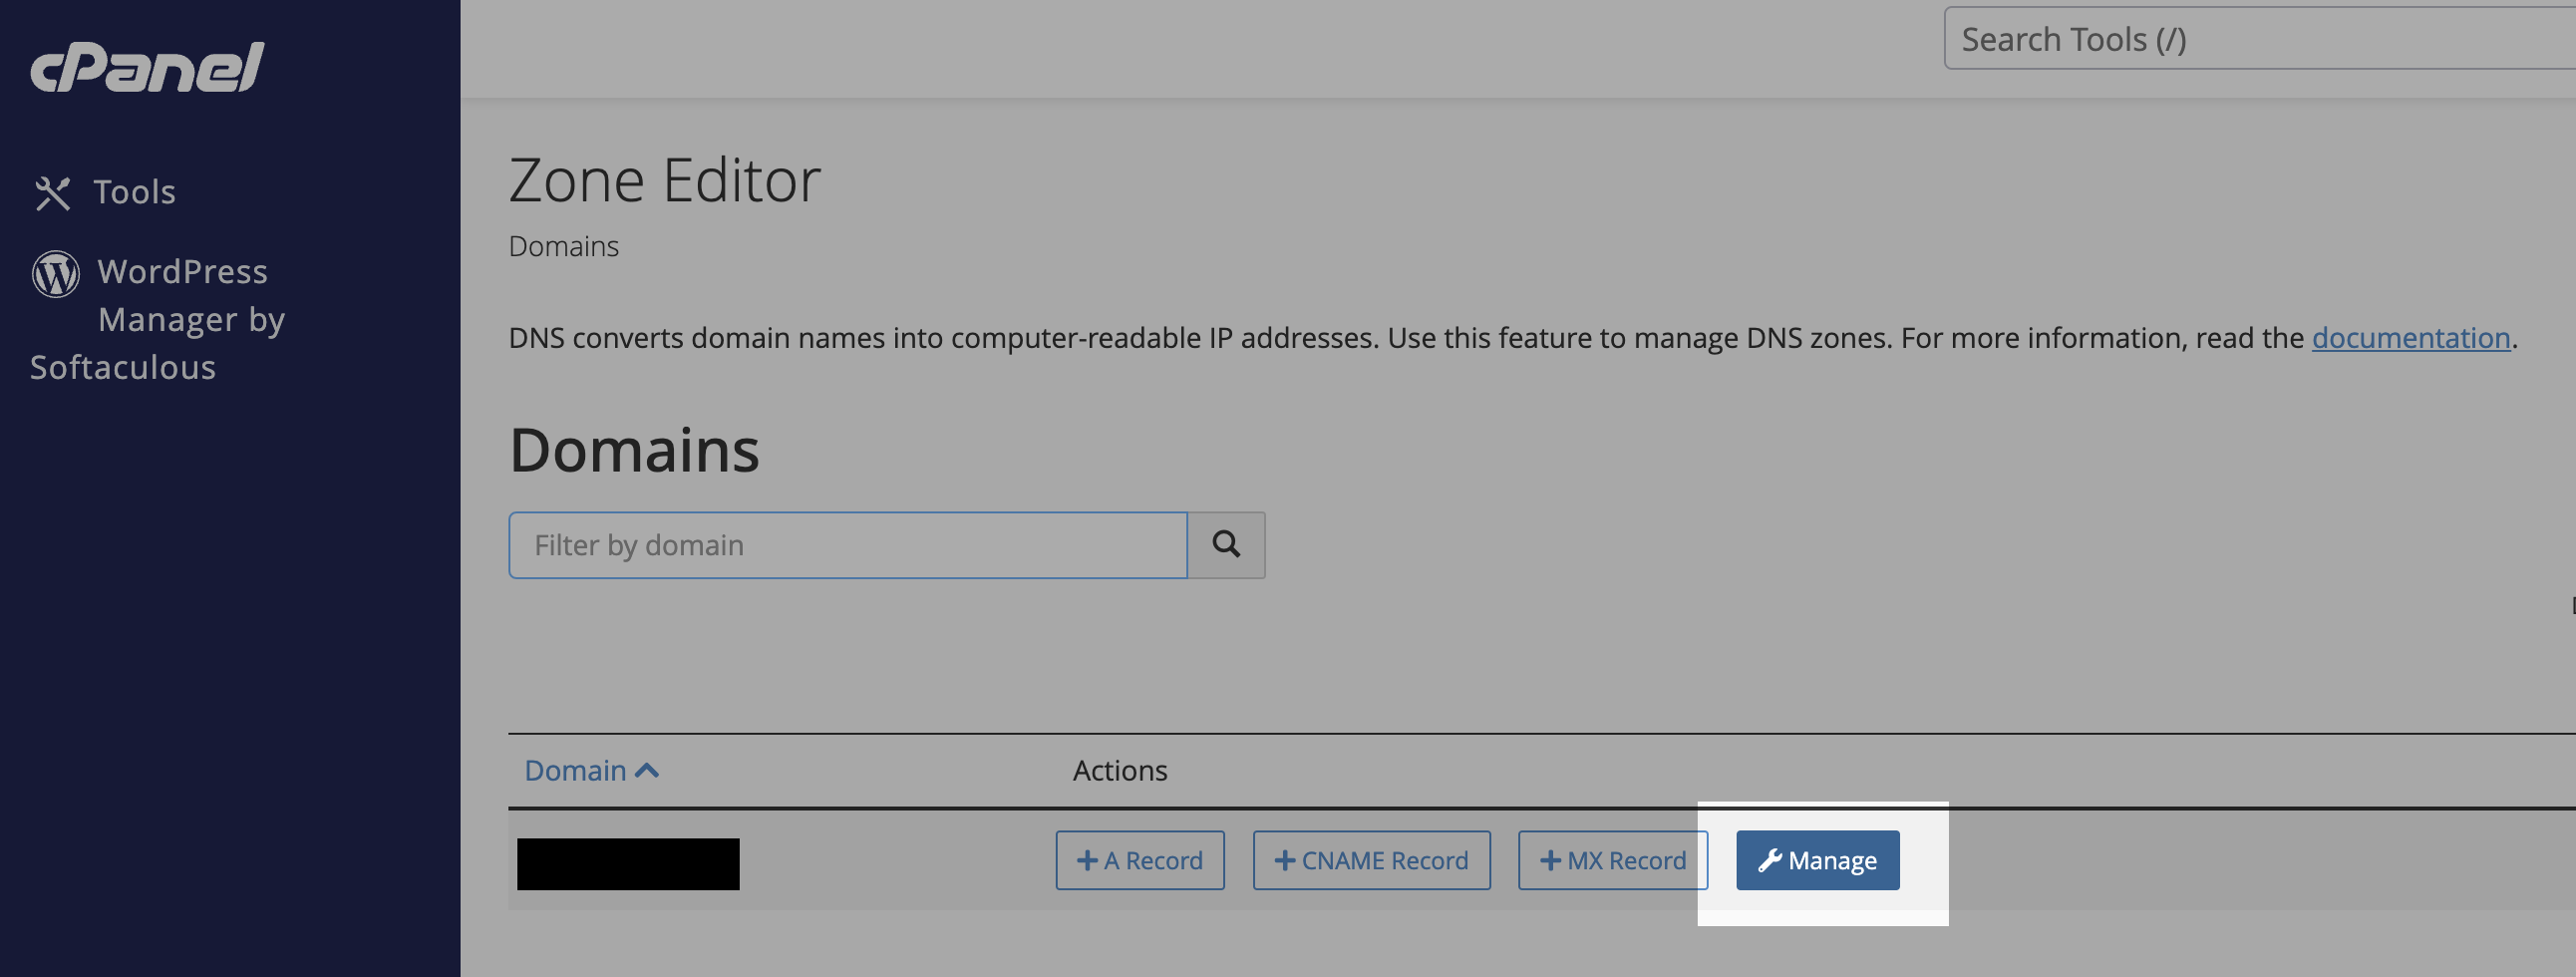
- Add a DNS Record
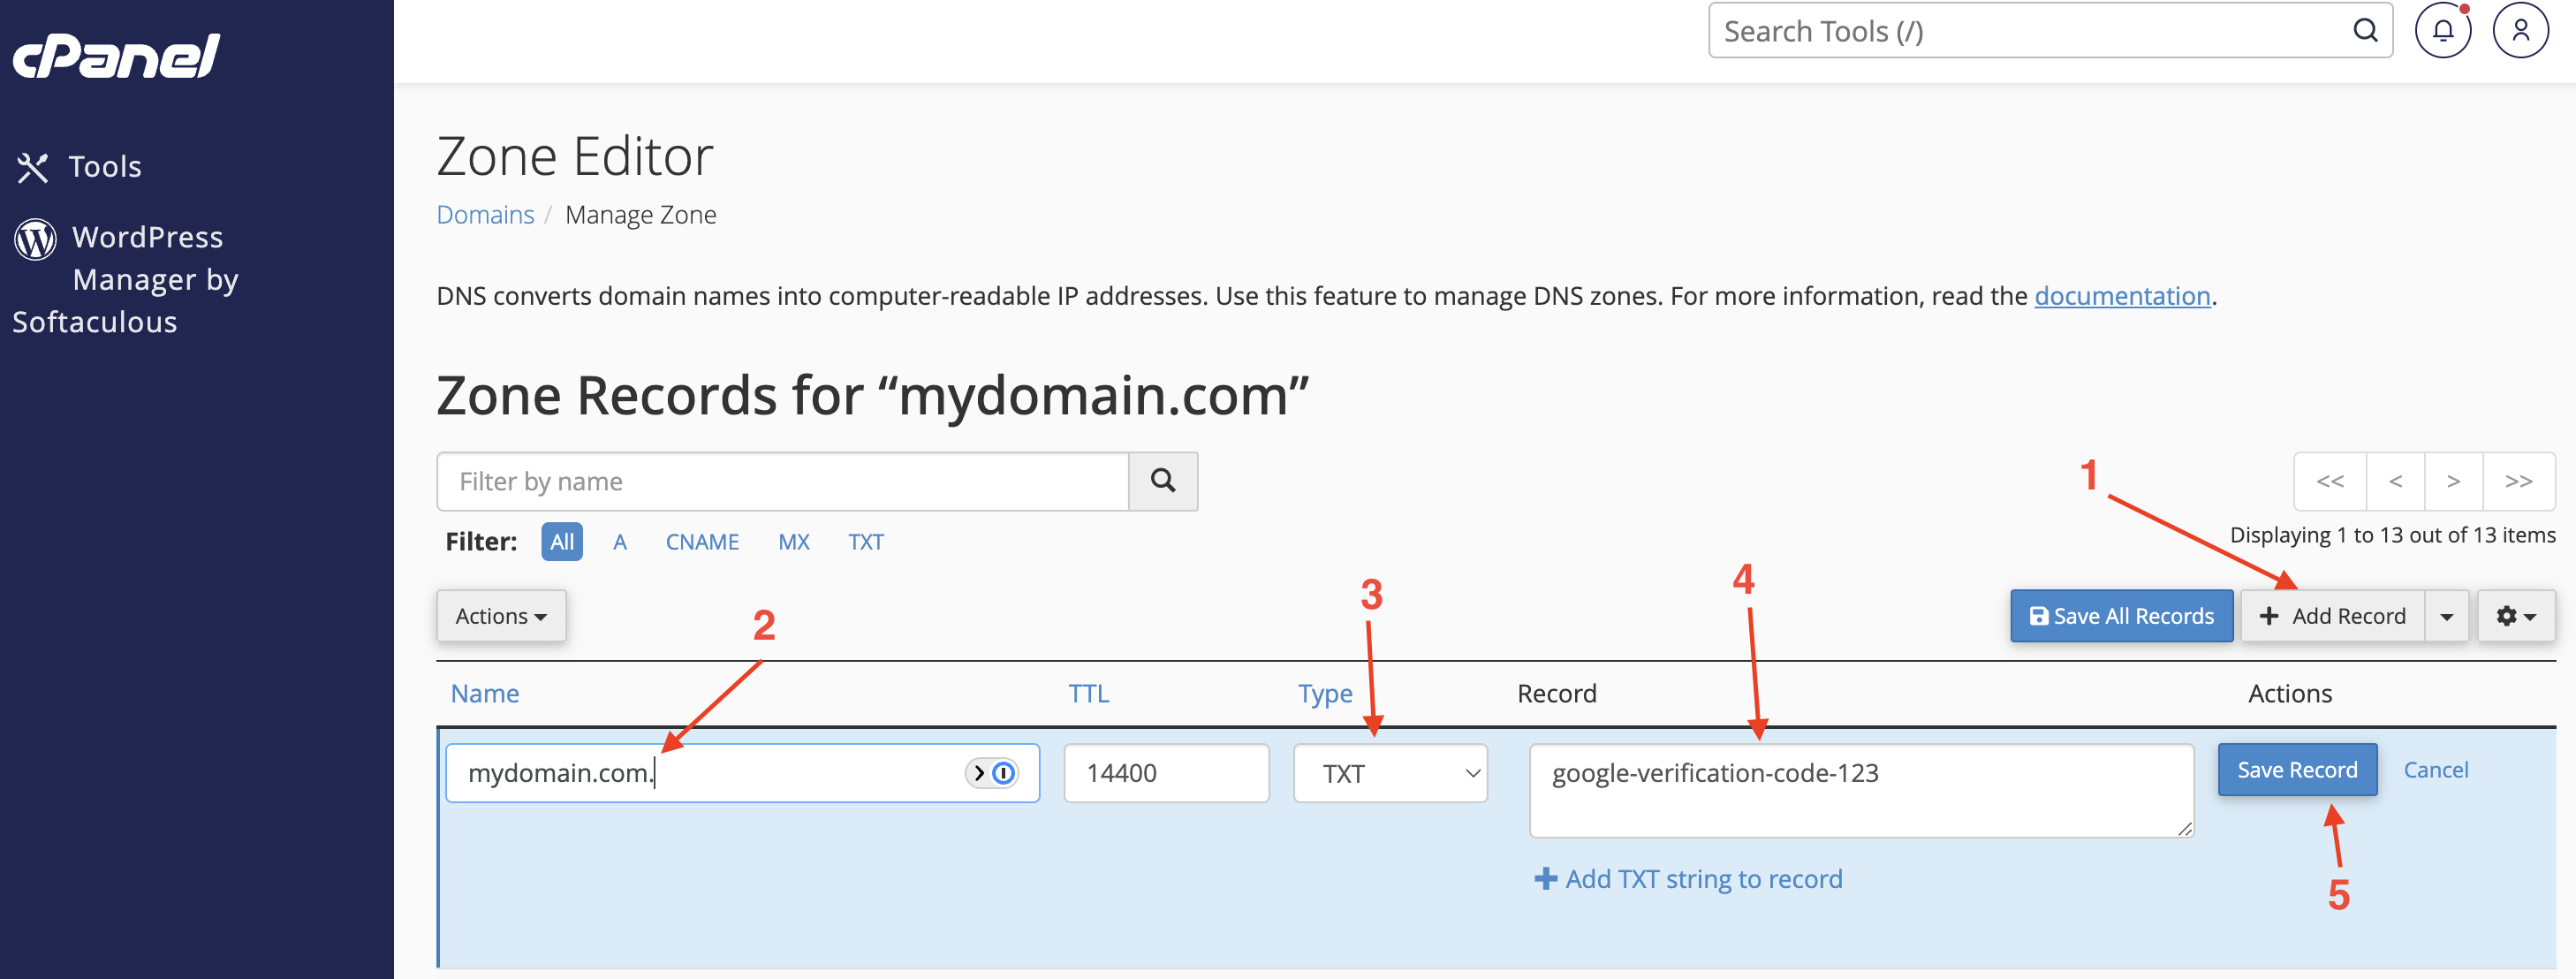
- Click on the “Add Record” button.
- Enter the domain for the record. For example
mydomain.comorsubdomain.mydomain.com. - Select the type of record you want to add (e.g., A, CNAME, MX, TXT).
- Enter the value for the record. For example, the IP address for an A record, the target for a CNAME record, or the mail server for an MX record.
- Click on the “Save Record” button to save the changes.
Need help?
Can't find what you're looking for? Our support team is here to help.